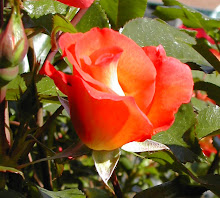

While heat is all relative, we're having quite a heat wave for our area. For us, that's temperatures in the upper 90's to triple digits for more than a day or two. It happens pretty much every summer for a week or two, but it seems to always be shocking to the residents of the area, who are used to thinking of themselves as living in a rainy and cloudy area.
Our new house is built with a daylight basement, which means the downstairs is fairly cool even with no air conditioning or fans, even in sweltering heat. Since we do most of our "living" downstairs, it's a pretty convenient state of affairs and much easier on the pocketbook than it might be if we had to cool most of the house. Conversely, it stays relatively warm in the winter, and if we run the wood stove, we don't have to turn on the natural gas furnace very often either. I suspect, though I don't know for sure, that our heating/cooling bills for this house are significantly lower than the previous house.
In any event, the heat has had me looking at weather reports from all over the country, and even outside the country. In particular, I have been examining the water restrictions in San Antonio, Texas, and in parts of Australia. We don't consume ridiculous amounts of water at our house; we don't water the lawn in the summer, we always run full loads of dishes and laundry, we mostly shower instead of taking baths, and we use rainwater we collected during the rainy season for incidental watering. However, we aren't particularly conservative about water, either. The weather reports just made me look at how our water consumption might have to change if we lived in an area so desperate for water, and has prompted me to conserve a little more water just "in honor" of them, to see what it might be like.
(On another note, the severe water shortages in arid, hot areas also point out the ridiculousness of humans. Who honestly thought that moving into a desert and then trying to live as if it were a temperate, farmable area was a good idea? Living there is fine, but living within the capabilities of the climate would have been much better for both humans and the environment. Who seriously tries to grow a lawn in a desert? Ah humans, always trying to bend Nature to their will. Eventually, Nature bites back, and her teeth are much bigger.)
For our area, we've been asked to conserve water, but it's more of a polite, "Hey, we would like it if you didn't tap all our water resources" request rather than a mandate. So today, I took the quart of just-off milk and poured it to my tomatoes instead of washing it down the drain. I washed my day's harvest of pickling cucumbers, peppermint, and onions over a bucket, and poured the gray water to the lilies and the hydrangea instead of watering them with the hose. I know in parts of Australia they shower in buckets; while I understand the need, I'm not quite that interested in the experimental mindset! Washing vegetables over a bucket doesn't make much difference, I know, but I suppose if everyone in my city were to cut back by just two gallons of water a day (about what I poured onto my flowers), it would lead to a daily savings of 34,000 gallons, or 238,000 gallons a week. I've heard the argument that water evaporates and goes back into the water cycle, so it doesn't matter how much we use. That'd be okay if it weren't also true that we use water faster than we the system can replace it in many areas. There's also the fact that humans pour water into a sewer system, where it then has to be cleaned and treated and purified, so any water that doesn't go down the drain means less stress on the infrastructure, and less expense to the homeowner both for water consumed and for sewer volume.
Even with water conservation in mind, in this heat, we're still filling up the wading pool for the little one, though! (When we have to drain it, it all goes on the various plants in the yard and into the bird baths and such.)
Showing posts with label waste reduction. Show all posts
Showing posts with label waste reduction. Show all posts
Sunday, July 26, 2009


Monday, May 18, 2009
Plants on a Budget
I love plants. There are certain places where it's dangerous for me to go unescorted, at least when I have my wallet with me: bookstores, craft stores, hardware stores, "organic" type food stores, and nurseries. I seem to be incapable of walking out of a nursery without at least one or two new plants. Problem is, they're expensive, and anyone who buys plants know this. Well, if you don't have a lot of cash, as a lot of us don't right now, there are some ways to keep your plant costs down.
* Where possible, start your veggies and flowers from seed. An entire packet of seeds generally costs the same as or less than a single full-size plant of the same species. If you use newspaper pots or egg cartons or even cut-off toilet paper tubes to start them, you'll save the cost of buying pots and reuse some waste materials at the same time! Of course, it means you have to start thinking about your garden earlier than if you bought large plants, but it's worth it to save some $$. And if you don't want to use an entire packet of seeds, go in with some friends and split them!
* Don't be afraid to buy the end of season rejects! The local Walgreens had out-of-season daffodils, hyacinths, and tulips in 4" pots for sale for $.50 each at the end of the season. All the blooms were spent, and they'd cut off the greenery about 4" up. Take them home, plant them, and they'll be just fine next year.
* Tsugawa has a Clearance section in their parking lot for sad orphan plants that are out of bloom, or otherwise bedraggled. Fred Meyer and other "mercantile" type stores with a nursery section often have a reject/sad plant area as well. You do want to be sure that the plants you pick up aren't actually diseased or laden with vermin, but usually the plants in those areas are just out of bloom, out of season, a little wilted from a heat wave, or somehow imperfect and in need of some extra TLC. Don't forget to look for indoor plants in these places too! At Home Depot, I once picked up a Christmas cactus in January for $1.00 because it had no blooms left. So what? I took it home, it bloomed the next year, and it's still hanging out with me years later.
* Trade with friends and neighbors! If you know folks who garden, schedule Plant Swaps in late spring and fall, when people have divided their plants and planted their seedlings. You can include seeds, pots, and other garden goodies in the exchange too!
* Check out Craigslist under the "Free" or "Garden" sections for free plants. Many gardeners like myself wind up with gaggles of orphan plants that self-seed in the yard, or an overabundance of seedlings from starting veggies, or even large plants from dividing in the spring and fall. I've given away masses of iris and hostas, starts from gooseberries and raspberries, and many herbs this way. Another good place to check is your local Freecycle. (Freecycle.org for the chapter near you!)
* Dumpster dive! Okay, this isn't one with which I'm personally comfortable, but I know people who do it quite successfully, and for much more than just plants! (Google "freegan" if you want to know more.) Nurseries and places like Home Depot often throw out their bedraggled plants en masse to get ready for the next "seasonal" shipment. I would suggest checking the local laws in your area for the legality of climbing into a dumpster before you do so. And if the store objects, politely leave. But you can certainly come away with some great plants for no money if you're willing to walk a little on the wild side.
* Scout out home sites that are going to be leveled or turned into subdivisions. Again, I'm not overly comfortable with this personally, but my parents and I used to do it when I was a kid. You know those abandoned, boarded-up homes slated to be turned into McHouses? Sometimes they have some fantastic plants out front, and if you don't rescue them, they will be run over by a bulldozer, quite literally. It's technically illegal to remove anything from private property without permission, so if you're interested in doing this, you might attempt to contact the property owners. I would imagine most wouldn't care, as the plants will just be destroyed anyway. Or if you're more daring than I, you might just take your chances. Be absolutely sure the property is going to be scraped bare or leveled before you start taking plants out, though.
DO NOT take plants from national forests or wildlife refuges. I know it's tempting to take home that beautiful tiger lily or snowdrop or trillium, but don't. Not only is it illegal, but it's also damaging to the ecosystem. Some plants are endangered in certain areas, and the plants should be allowed to reproduce so all the insects, animals, and humans can enjoy them in their natural habitat.
* Where possible, start your veggies and flowers from seed. An entire packet of seeds generally costs the same as or less than a single full-size plant of the same species. If you use newspaper pots or egg cartons or even cut-off toilet paper tubes to start them, you'll save the cost of buying pots and reuse some waste materials at the same time! Of course, it means you have to start thinking about your garden earlier than if you bought large plants, but it's worth it to save some $$. And if you don't want to use an entire packet of seeds, go in with some friends and split them!
* Don't be afraid to buy the end of season rejects! The local Walgreens had out-of-season daffodils, hyacinths, and tulips in 4" pots for sale for $.50 each at the end of the season. All the blooms were spent, and they'd cut off the greenery about 4" up. Take them home, plant them, and they'll be just fine next year.
* Tsugawa has a Clearance section in their parking lot for sad orphan plants that are out of bloom, or otherwise bedraggled. Fred Meyer and other "mercantile" type stores with a nursery section often have a reject/sad plant area as well. You do want to be sure that the plants you pick up aren't actually diseased or laden with vermin, but usually the plants in those areas are just out of bloom, out of season, a little wilted from a heat wave, or somehow imperfect and in need of some extra TLC. Don't forget to look for indoor plants in these places too! At Home Depot, I once picked up a Christmas cactus in January for $1.00 because it had no blooms left. So what? I took it home, it bloomed the next year, and it's still hanging out with me years later.
* Trade with friends and neighbors! If you know folks who garden, schedule Plant Swaps in late spring and fall, when people have divided their plants and planted their seedlings. You can include seeds, pots, and other garden goodies in the exchange too!
* Check out Craigslist under the "Free" or "Garden" sections for free plants. Many gardeners like myself wind up with gaggles of orphan plants that self-seed in the yard, or an overabundance of seedlings from starting veggies, or even large plants from dividing in the spring and fall. I've given away masses of iris and hostas, starts from gooseberries and raspberries, and many herbs this way. Another good place to check is your local Freecycle. (Freecycle.org for the chapter near you!)
* Dumpster dive! Okay, this isn't one with which I'm personally comfortable, but I know people who do it quite successfully, and for much more than just plants! (Google "freegan" if you want to know more.) Nurseries and places like Home Depot often throw out their bedraggled plants en masse to get ready for the next "seasonal" shipment. I would suggest checking the local laws in your area for the legality of climbing into a dumpster before you do so. And if the store objects, politely leave. But you can certainly come away with some great plants for no money if you're willing to walk a little on the wild side.
* Scout out home sites that are going to be leveled or turned into subdivisions. Again, I'm not overly comfortable with this personally, but my parents and I used to do it when I was a kid. You know those abandoned, boarded-up homes slated to be turned into McHouses? Sometimes they have some fantastic plants out front, and if you don't rescue them, they will be run over by a bulldozer, quite literally. It's technically illegal to remove anything from private property without permission, so if you're interested in doing this, you might attempt to contact the property owners. I would imagine most wouldn't care, as the plants will just be destroyed anyway. Or if you're more daring than I, you might just take your chances. Be absolutely sure the property is going to be scraped bare or leveled before you start taking plants out, though.
DO NOT take plants from national forests or wildlife refuges. I know it's tempting to take home that beautiful tiger lily or snowdrop or trillium, but don't. Not only is it illegal, but it's also damaging to the ecosystem. Some plants are endangered in certain areas, and the plants should be allowed to reproduce so all the insects, animals, and humans can enjoy them in their natural habitat.
Thursday, May 14, 2009
Newspaper Plant Starter Pots
So I just wrote about dealing with the overflow of plastic pots you might have if you buy plants very often. Of course one easy thing to do with them is use them to start new seeds. But if you actually have a situation where you don't have enough little plastic pots, or yours are all too large, then what?
You can of course buy peat pellets, or the brown biodegradable pots you can plant right along with your seedlings. Or...you can make your own "plantable" pots out of recycled newspaper. Cheaper, available in endless quantities so you never run out in the middle of planting, makes good use of waste materials, and kinda fun to do, especially if you have kids!
 There are several methods. All of them require:


If you want to make this a more permanent setup, take an empty pop can, fill it with sand, and seal the top tightly with duct tape. For the base, take a block of wood slightly larger than the diameter of the pop can, place a juice jug lid in the center of it, and glue it in place with heavy-duty glue like gorilla glue or barge cement. Not so pretty, but it'll work well enough!
You can of course buy peat pellets, or the brown biodegradable pots you can plant right along with your seedlings. Or...you can make your own "plantable" pots out of recycled newspaper. Cheaper, available in endless quantities so you never run out in the middle of planting, makes good use of waste materials, and kinda fun to do, especially if you have kids!
 There are several methods. All of them require:
 * Black and white newsprint (no colored newspaper)
OR plain brown paper, as from shopping bags
OR other plain, uncolored paper, at least 10" in length and 3.5" wide
* Scissors or a paper cutter
* Potting soil
* Seeds or seedlings
OR plain brown paper, as from shopping bags
OR other plain, uncolored paper, at least 10" in length and 3.5" wide
* Scissors or a paper cutter
* Potting soil
* Seeds or seedlings
* Brown paper tape (optional - use paper tape as it's biodegradable)
Method 1: Storebought Pot Making Tool
I have one of these little doodads, called a Pot Maker. They're available at various garden stores, and range in price from $9.99 to $19.99, so shop around.
Take your paper, and cut strips 3 1/2" wide by 10" (at least) long. Wrap a strip around the pot form, leaving the first corner sticking up a little bit and wrapping the rest around the cylinder part of the form. You should have it fairly even at the top of the cylinder, and have quite a bit sticking over the bottom.


Fold in the bottom on one side, then the other, creating two pointed bits. Fold in one point, then the other. (You rolled coins sometime in your life, right? Same idea.) Press the folded bottom down onto the mold form, and twist a few times to crease. Remove from the form, and fold the little pointy corner you left at the top forward over the side of the pot, to secure it.


Fill with dirt and seeds or seedlings, pack tightly into a seed-starting tray, pan, or box, and you're good to go!
Method 2: Homemade Pot Making Tool
Two words: Pop Can. Seriously. It's a little larger than the pot making tool described above, but it's got the divot on the bottom and it's cylindrical. Plus it's basically free. A full pop can will work better than an empty one, just because you won't have to worry about crushing it, but either way will suffice. And if you crush an empty one, hey, you can always get another.
Measure the paper lengthwise to wrap at least twice around the can, and widthwise to go halfway up the pop can plus 3/4 of the way across the bottom. Proceed as above. When it comes time to smash it onto the bottom form, use a lid from a milk or preferably a juice jug, and press the bottom of the can firmly onto that, twisting to be sure it creases. If you have difficulty getting it to crease, you can add a small piece of brown paper tape to your pot to hold it together.
Two words: Pop Can. Seriously. It's a little larger than the pot making tool described above, but it's got the divot on the bottom and it's cylindrical. Plus it's basically free. A full pop can will work better than an empty one, just because you won't have to worry about crushing it, but either way will suffice. And if you crush an empty one, hey, you can always get another.
Measure the paper lengthwise to wrap at least twice around the can, and widthwise to go halfway up the pop can plus 3/4 of the way across the bottom. Proceed as above. When it comes time to smash it onto the bottom form, use a lid from a milk or preferably a juice jug, and press the bottom of the can firmly onto that, twisting to be sure it creases. If you have difficulty getting it to crease, you can add a small piece of brown paper tape to your pot to hold it together.
If you want to make this a more permanent setup, take an empty pop can, fill it with sand, and seal the top tightly with duct tape. For the base, take a block of wood slightly larger than the diameter of the pop can, place a juice jug lid in the center of it, and glue it in place with heavy-duty glue like gorilla glue or barge cement. Not so pretty, but it'll work well enough!
You can actually use any size cylinder you like, from a fish food container to a can of vegetables. If you don't have the divot on the bottom for crimping, just secure the bottom fold with a piece of paper tape.
Method 3: Origami
I haven't the patience for this method, but some people do! It makes containers more sturdy than the above, and some can be done with recycled printer paper (check to be sure your inks don't contain anything toxic. Soy ink is ideal.)
Method 3: Origami
I haven't the patience for this method, but some people do! It makes containers more sturdy than the above, and some can be done with recycled printer paper (check to be sure your inks don't contain anything toxic. Soy ink is ideal.)
Some of you probably made origami boxes as a kid. Same idea for newspaper pots! Since I'm not an Origami gal, I'm going to leave some pointers to tutorials.
Origami Seedling Pot Instructional Video - bit long, but thorough, and good design.
Origami Seedling Pot - same basic pot as above, pictures and instructions
Origami Box - Sure looks the same as the others, but it's from Rachael Ray's site, and it's designed for use with thicker paper to make party snack holders.
Origami Seedling Pot Video 2 - About half as long as the first one, same basic pot.
Notes About Newspaper Pots
* I don't find these pots to be terribly sturdy, so you're probably going to want to pack them close together in a tray. A reusable seed-starting tray would be ideal, but an old roasting pan (check Goodwill or your local thrift stores) or even a very sturdy cardboard box would do...just remember the cardboard will get wet and eventually disintegrate.
* Again because they're not terribly sturdy, you're probably going to want to use a fairly loose, dry potting soil mix to fill the pots. Of course it will compact down when you water it, it just makes loading the little pot easier.
Notes About Newspaper Pots
* I don't find these pots to be terribly sturdy, so you're probably going to want to pack them close together in a tray. A reusable seed-starting tray would be ideal, but an old roasting pan (check Goodwill or your local thrift stores) or even a very sturdy cardboard box would do...just remember the cardboard will get wet and eventually disintegrate.
* Again because they're not terribly sturdy, you're probably going to want to use a fairly loose, dry potting soil mix to fill the pots. Of course it will compact down when you water it, it just makes loading the little pot easier.
* They do dry out fairly quickly, though if you keep them packed shoulder to shoulder and in a humid greenhouse, it won't be much of an issue.
* And finally, when it comes to planting these guys, you won't be able to carry them too far unless your seedlings have become rootbound, in which case the roots will hold the soil together. Just carry the entire tray over to where you're going to plant, and lift each pot out carefully or they will fall apart. (This is also true of most peat pots after a few weeks of being in the greenhouse, so it's not really much different.)
Wednesday, May 13, 2009
Nursery Pot Recycling
It's late spring, and gardens are underway everywhere during this prime planting time. For folks who buy plants at nurseries or garden stores, this tends to leave one with a flood of plastic pots of all shapes and sizes. (If your storage shed is anything like mine, you'd swear they reproduce as soon as the doors are shut...) So what do you do with your leftover pots?
I discovered that Tsugawa's Nursery in Woodland, WA, has a nifty solution to the problem of Pot Overpopulation. Right next to their parking lot, they have a large wooden bin for nursery pots of 1 gallon size or smaller. The little sign on the bin encourages folks to toss in their used, empty pots, or to take the pots they might need. Kinda like those little penny trays in convenience stores, only frankly more useful!
If you don't live near Tsugawa, you might check to see if your local nursery equivalent has a similar exchange program, or encourage them to set one up!
Other things you might do with your used pots:
* Save them and load them up with orphan plant babies all year long. Then organize an Orphan Plant Exchange in your local area through a listing such as Craigslist or Freecycle.
* Call up your local County Extension office and find the Master Gardener program. Some of these programs do plant sales as fund raisers, and often want the gallon or larger pots.
* Visit your local farmer's market and find out if any of the vendors there might want them. Some of the farmers run on a very thin profit margin, and might be glad for clean, useable nursery pots.
* Save them up, then post them on your local Freecycle group or on the Free section of your local Craigslist. Almost guaranteed someone will snap them up quickly. (Same goes for orphan plants...I never have trouble getting rid of mine!)
I discovered that Tsugawa's Nursery in Woodland, WA, has a nifty solution to the problem of Pot Overpopulation. Right next to their parking lot, they have a large wooden bin for nursery pots of 1 gallon size or smaller. The little sign on the bin encourages folks to toss in their used, empty pots, or to take the pots they might need. Kinda like those little penny trays in convenience stores, only frankly more useful!
If you don't live near Tsugawa, you might check to see if your local nursery equivalent has a similar exchange program, or encourage them to set one up!
Other things you might do with your used pots:
* Save them and load them up with orphan plant babies all year long. Then organize an Orphan Plant Exchange in your local area through a listing such as Craigslist or Freecycle.
* Call up your local County Extension office and find the Master Gardener program. Some of these programs do plant sales as fund raisers, and often want the gallon or larger pots.
* Visit your local farmer's market and find out if any of the vendors there might want them. Some of the farmers run on a very thin profit margin, and might be glad for clean, useable nursery pots.
* Save them up, then post them on your local Freecycle group or on the Free section of your local Craigslist. Almost guaranteed someone will snap them up quickly. (Same goes for orphan plants...I never have trouble getting rid of mine!)
Friday, May 8, 2009
Bananananana Bread
I've been trying to cut down on our garbage output, especially in the form of wasted food. We compost, and we feed scraps to our chickens, and I've been getting better about using leftovers and freezing half of the large batches of food I make so they don't go bad before they're consumed. So I always feel a little twinge of "Yay!" when I use up some food that might have been a garbage can candidate.
Lately I've been freezing bananas when they go a little overripe. I like my bananas in that 24 hour window where they are perfectly yellow and ripe; no astringent taste from the greenness, and yet not at all mushy. (As you might expect, I don't eat many bananas.) My husband and daughter like them a little green. This means that any bananas that pass my threshold of edibility are way past theirs, and therefore go uneaten. The overripe bananas generally occur one a a time, which is too few for use in my recipes, so we used to feed them to the roses, or simply compost them. Then I learned that you can throw an entire unpeeled banana in the freezer and save it for later! When you get adequate amounts, make something!
It's really as easy as throwing the banana in the freezer, no need for a container or wrap. It will turn black and unappealing, and the banana is definitely beyond regular edibility after freezing, but it's still perfectly fine for recipes. To use the bananas in banana bread or smoothies, take out of the freezer and allow to thaw for about 20 minutes. Snip the end off the banana peel, and squeeze from the bottom. The entire banana will slide out of the skin. It's kind of gross, but very convenient and sort of cool too. It's almost pre-mushed!
Banana Bread
* 1 3/4 cup flour
* 2/3 cup sugar
* 2 tsp baking powder
* 1/2 tsp baking soda
* 1/4 tsp salt
* 1 cup mashed bananas
* 1/3 cup softened butter (you can also use margarine or shortening)
* 2 Tbls milk
* 2 eggs (farm fresh if ya got 'em!)
* 1 Tbls cinnamon
* 1 tsp allspice
* 1/2 tsp ginger
* 1/2 tsp nutmeg
* Chopped nuts (optional)
Preheat oven to 350. Grease bottom only of loaf pan, set aside.
In a large mixing bowl, combine 1 cup of flour, plus the sugar, baking powder, baking soda, salt, and mashed bananas. Stir well, then add the butter and milk and beat well with a mixer for 2 minutes. Add eggs and spices, blend well. If desired, add nuts, blend well. Pour into the prepared loaf pan and bake 60 minutes, or until a pick inserted into the center comes out clean. Remove from oven, allow to cool 5 minutes, invert onto rack, and cool thoroughly before slicing.
Lately I've been freezing bananas when they go a little overripe. I like my bananas in that 24 hour window where they are perfectly yellow and ripe; no astringent taste from the greenness, and yet not at all mushy. (As you might expect, I don't eat many bananas.) My husband and daughter like them a little green. This means that any bananas that pass my threshold of edibility are way past theirs, and therefore go uneaten. The overripe bananas generally occur one a a time, which is too few for use in my recipes, so we used to feed them to the roses, or simply compost them. Then I learned that you can throw an entire unpeeled banana in the freezer and save it for later! When you get adequate amounts, make something!
It's really as easy as throwing the banana in the freezer, no need for a container or wrap. It will turn black and unappealing, and the banana is definitely beyond regular edibility after freezing, but it's still perfectly fine for recipes. To use the bananas in banana bread or smoothies, take out of the freezer and allow to thaw for about 20 minutes. Snip the end off the banana peel, and squeeze from the bottom. The entire banana will slide out of the skin. It's kind of gross, but very convenient and sort of cool too. It's almost pre-mushed!
Banana Bread
* 1 3/4 cup flour
* 2/3 cup sugar
* 2 tsp baking powder
* 1/2 tsp baking soda
* 1/4 tsp salt
* 1 cup mashed bananas
* 1/3 cup softened butter (you can also use margarine or shortening)
* 2 Tbls milk
* 2 eggs (farm fresh if ya got 'em!)
* 1 Tbls cinnamon
* 1 tsp allspice
* 1/2 tsp ginger
* 1/2 tsp nutmeg
* Chopped nuts (optional)
Preheat oven to 350. Grease bottom only of loaf pan, set aside.
In a large mixing bowl, combine 1 cup of flour, plus the sugar, baking powder, baking soda, salt, and mashed bananas. Stir well, then add the butter and milk and beat well with a mixer for 2 minutes. Add eggs and spices, blend well. If desired, add nuts, blend well. Pour into the prepared loaf pan and bake 60 minutes, or until a pick inserted into the center comes out clean. Remove from oven, allow to cool 5 minutes, invert onto rack, and cool thoroughly before slicing.
Subscribe to:
Posts (Atom)